

If you shop or dine in the city these days, you’ll find that industrial pipes have made their way into hip metro hangouts as rustic-utility decor. I love it. The look of metal and wood excites my male design sense, and the thought of using materials meant for plumbing for a different creative purpose is just plain cool. I’ve been thinking about doing something in this style for a few months now… especially since my wife equally loves this look.

Our dilemma came about when we bought our king size bed and placed it in our relatively small bedroom. We were forced to move everything out of the bedroom to make room for our beautiful-but-outrageously-big bed frame. The wall in front of the bed, which was once home to our handmade dresser, was now empty. We needed some sort of storage for some small items (a small flatscreen, pictures, etc), but no store-bought shelf was skinny enough. This was the perfect opportunity to try out that industrial pipe shelf idea that’d been simmering in my head.
I scoured the interweb for some ideas and pictures, and found that Keen had some really great, simple, and detailed plans online. She’d already done almost EXACTLY what I wanted to do in our bedroom. I used her basic schematic and adapted it to our situation. I just adjusted for the size I wanted. There were a few other sites that had similar shelving plans, but Keen’s looked the simplest and most pleasing to the eye.
I started with a plan for a low-profile unit with 18-inch shelf sections. I wanted the profile to be greater than 7″ but smaller than 11″. Any smaller than 7, and the TV base wouldn’t fit. Any larger than 11, and there wouldn’t be any room to walk in between my bed and the shelf. Using these pipes gave me the flexibility to make the shelf exactly what I needed.
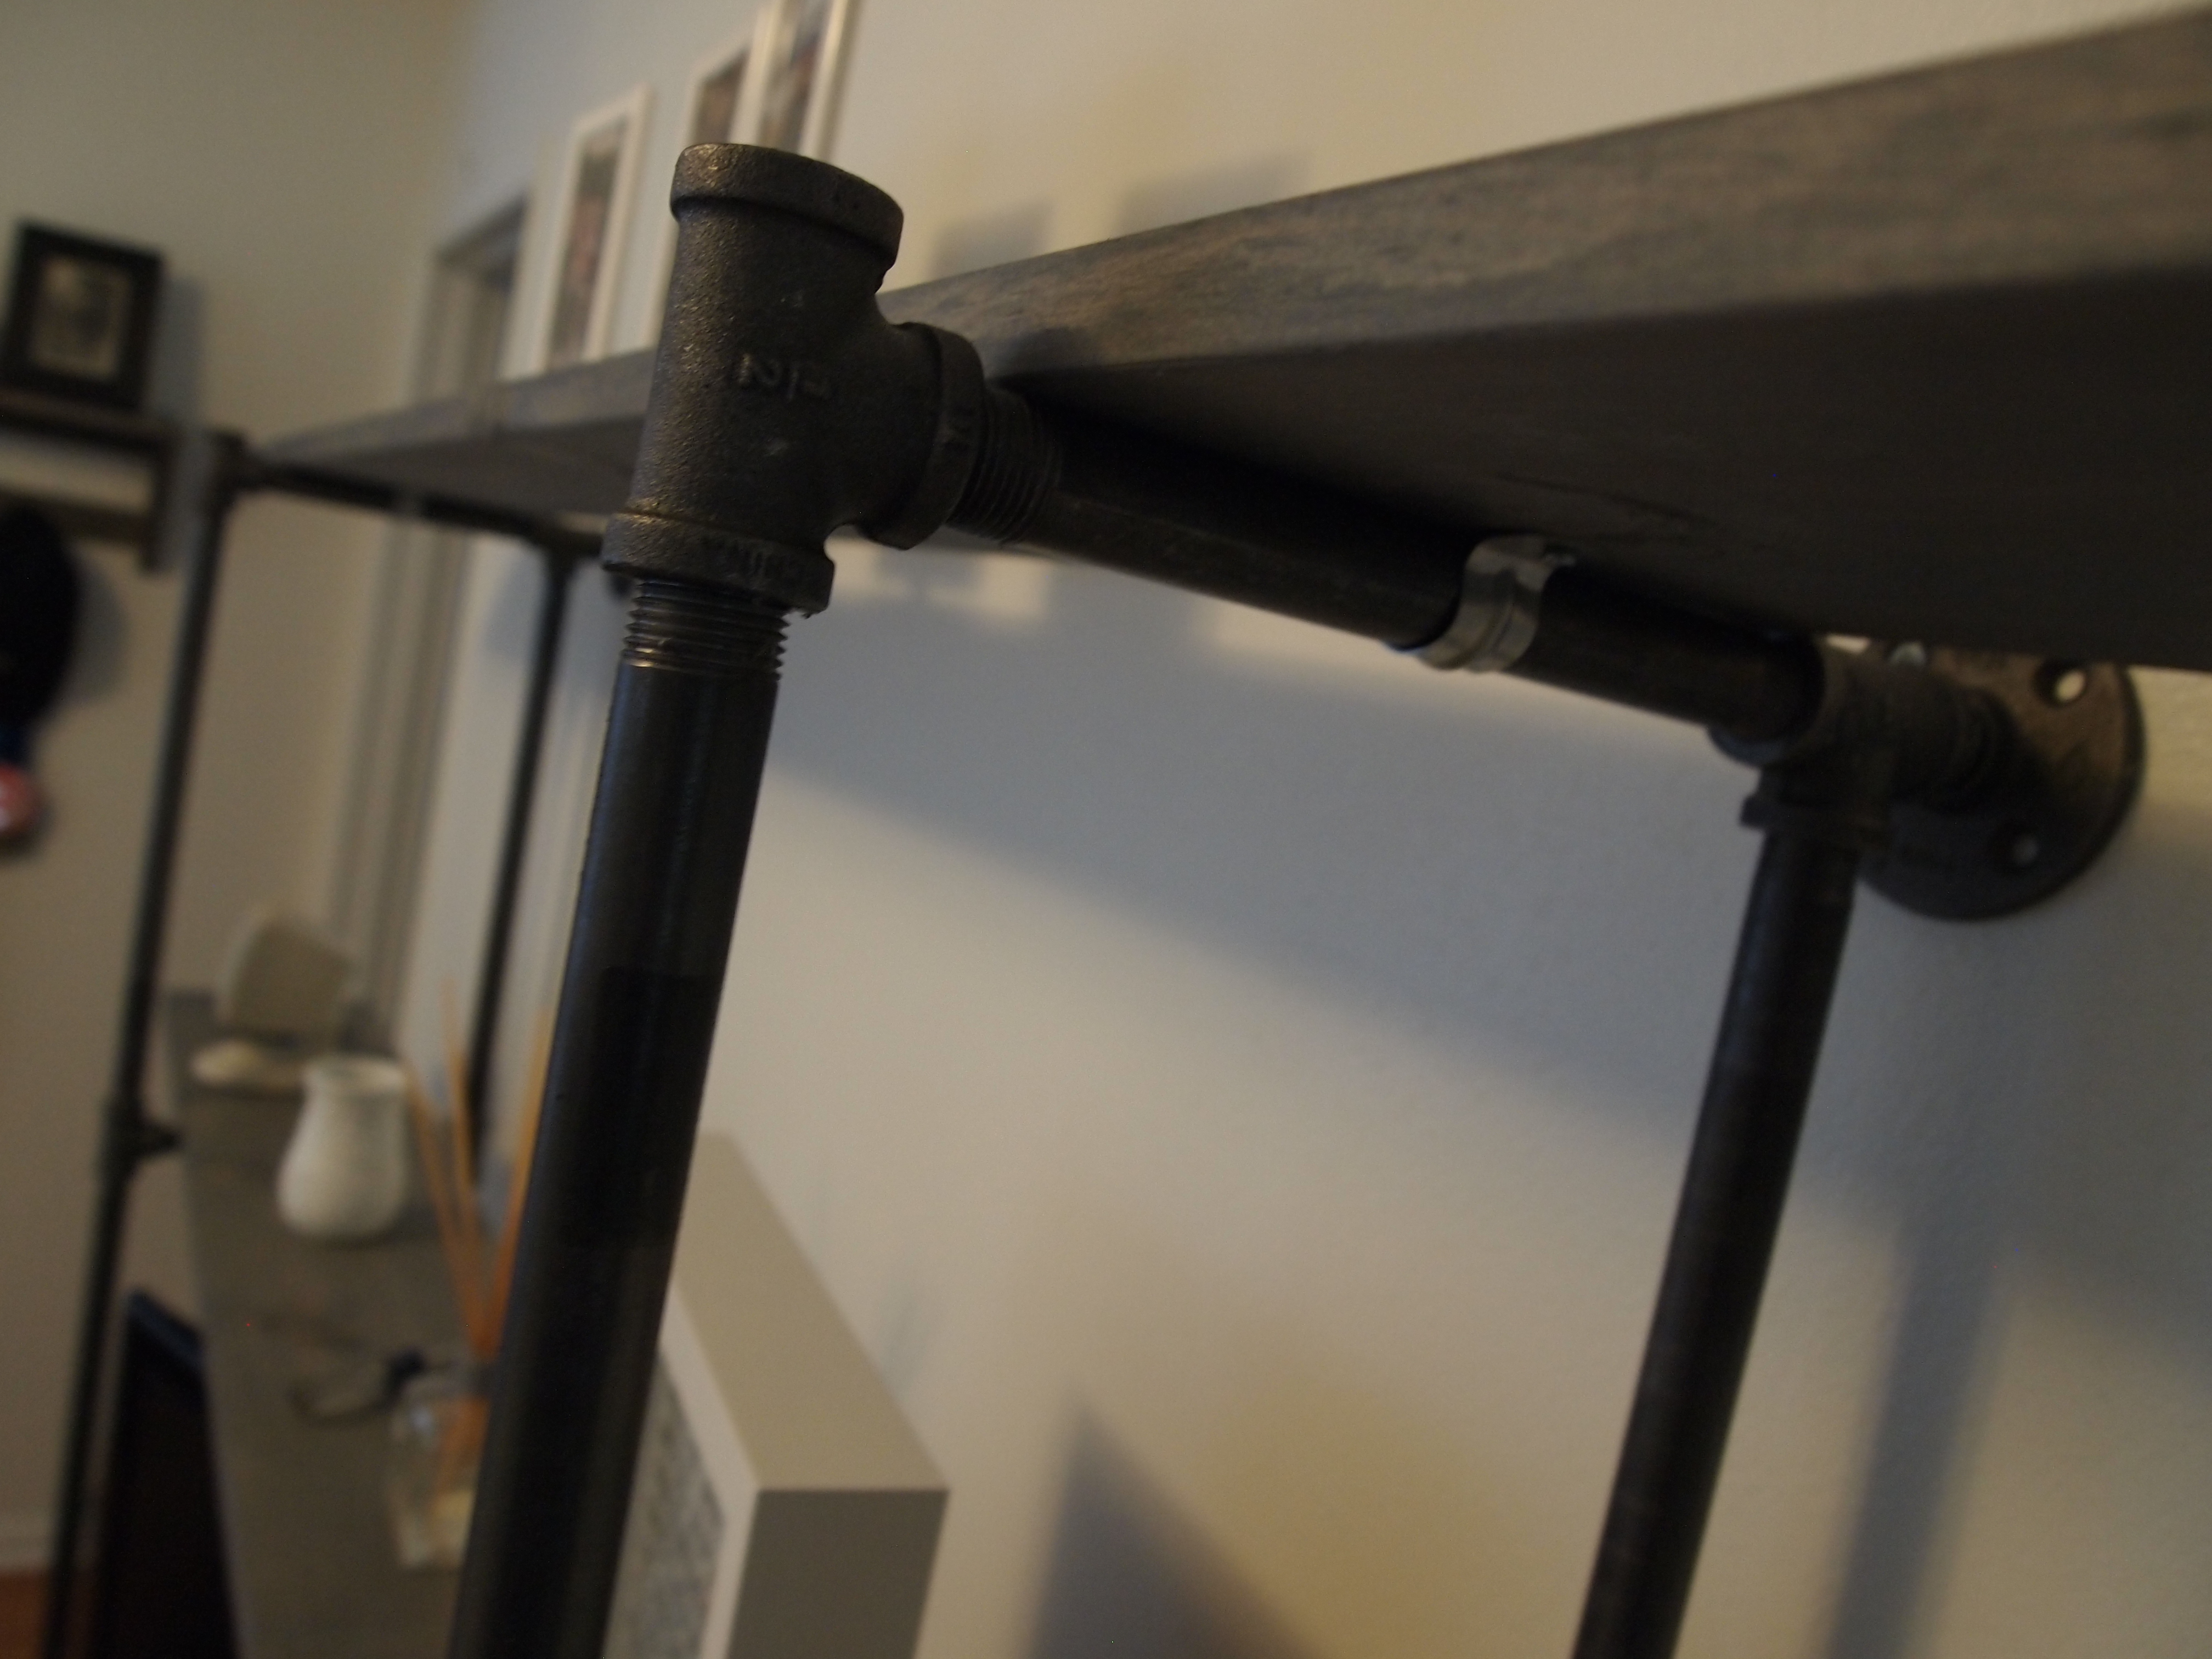
I began with creating two pipe support arms for the planks. A caution with the black steel pipes – they are covered with grease and will get anything that touches it very black and greasy. Many blogs say to wash them in a tub or use various soaps. I, along with others, have found that a little dish soap, water, and a rag will get most of the grease off. Be warned that if you don’t have gloves with you at Home Depot, you’ll come home with black pipes and black palms.
One more word of advice: be prepared for a hefty bill at Home Depot. I ended up spending a little under $200 for materials… more than one would hope for a diy shelf, but keep in mind that the shelf would definitely go for much more if you bought it. In the end, I still think it’s worth the money. You get to build something and be creative!
A look at most designs for these types of shelves makes it look very easy. I soon discovered that this was not the case. These pipes were designed for sequential assembly (starting at one end, then screwing the next pipe into the previous one, one after another). With this design, you have to screw the pipes into a closed “circuit”. It all works fine until you want to close off the circuit to complete the “circle”. The last pipe does not fit into the threading correctly. When you screw the last pipe in, you end up unscrewing it from the other end (If that doesn’t make sense, try building it and you will soon find out what I mean).
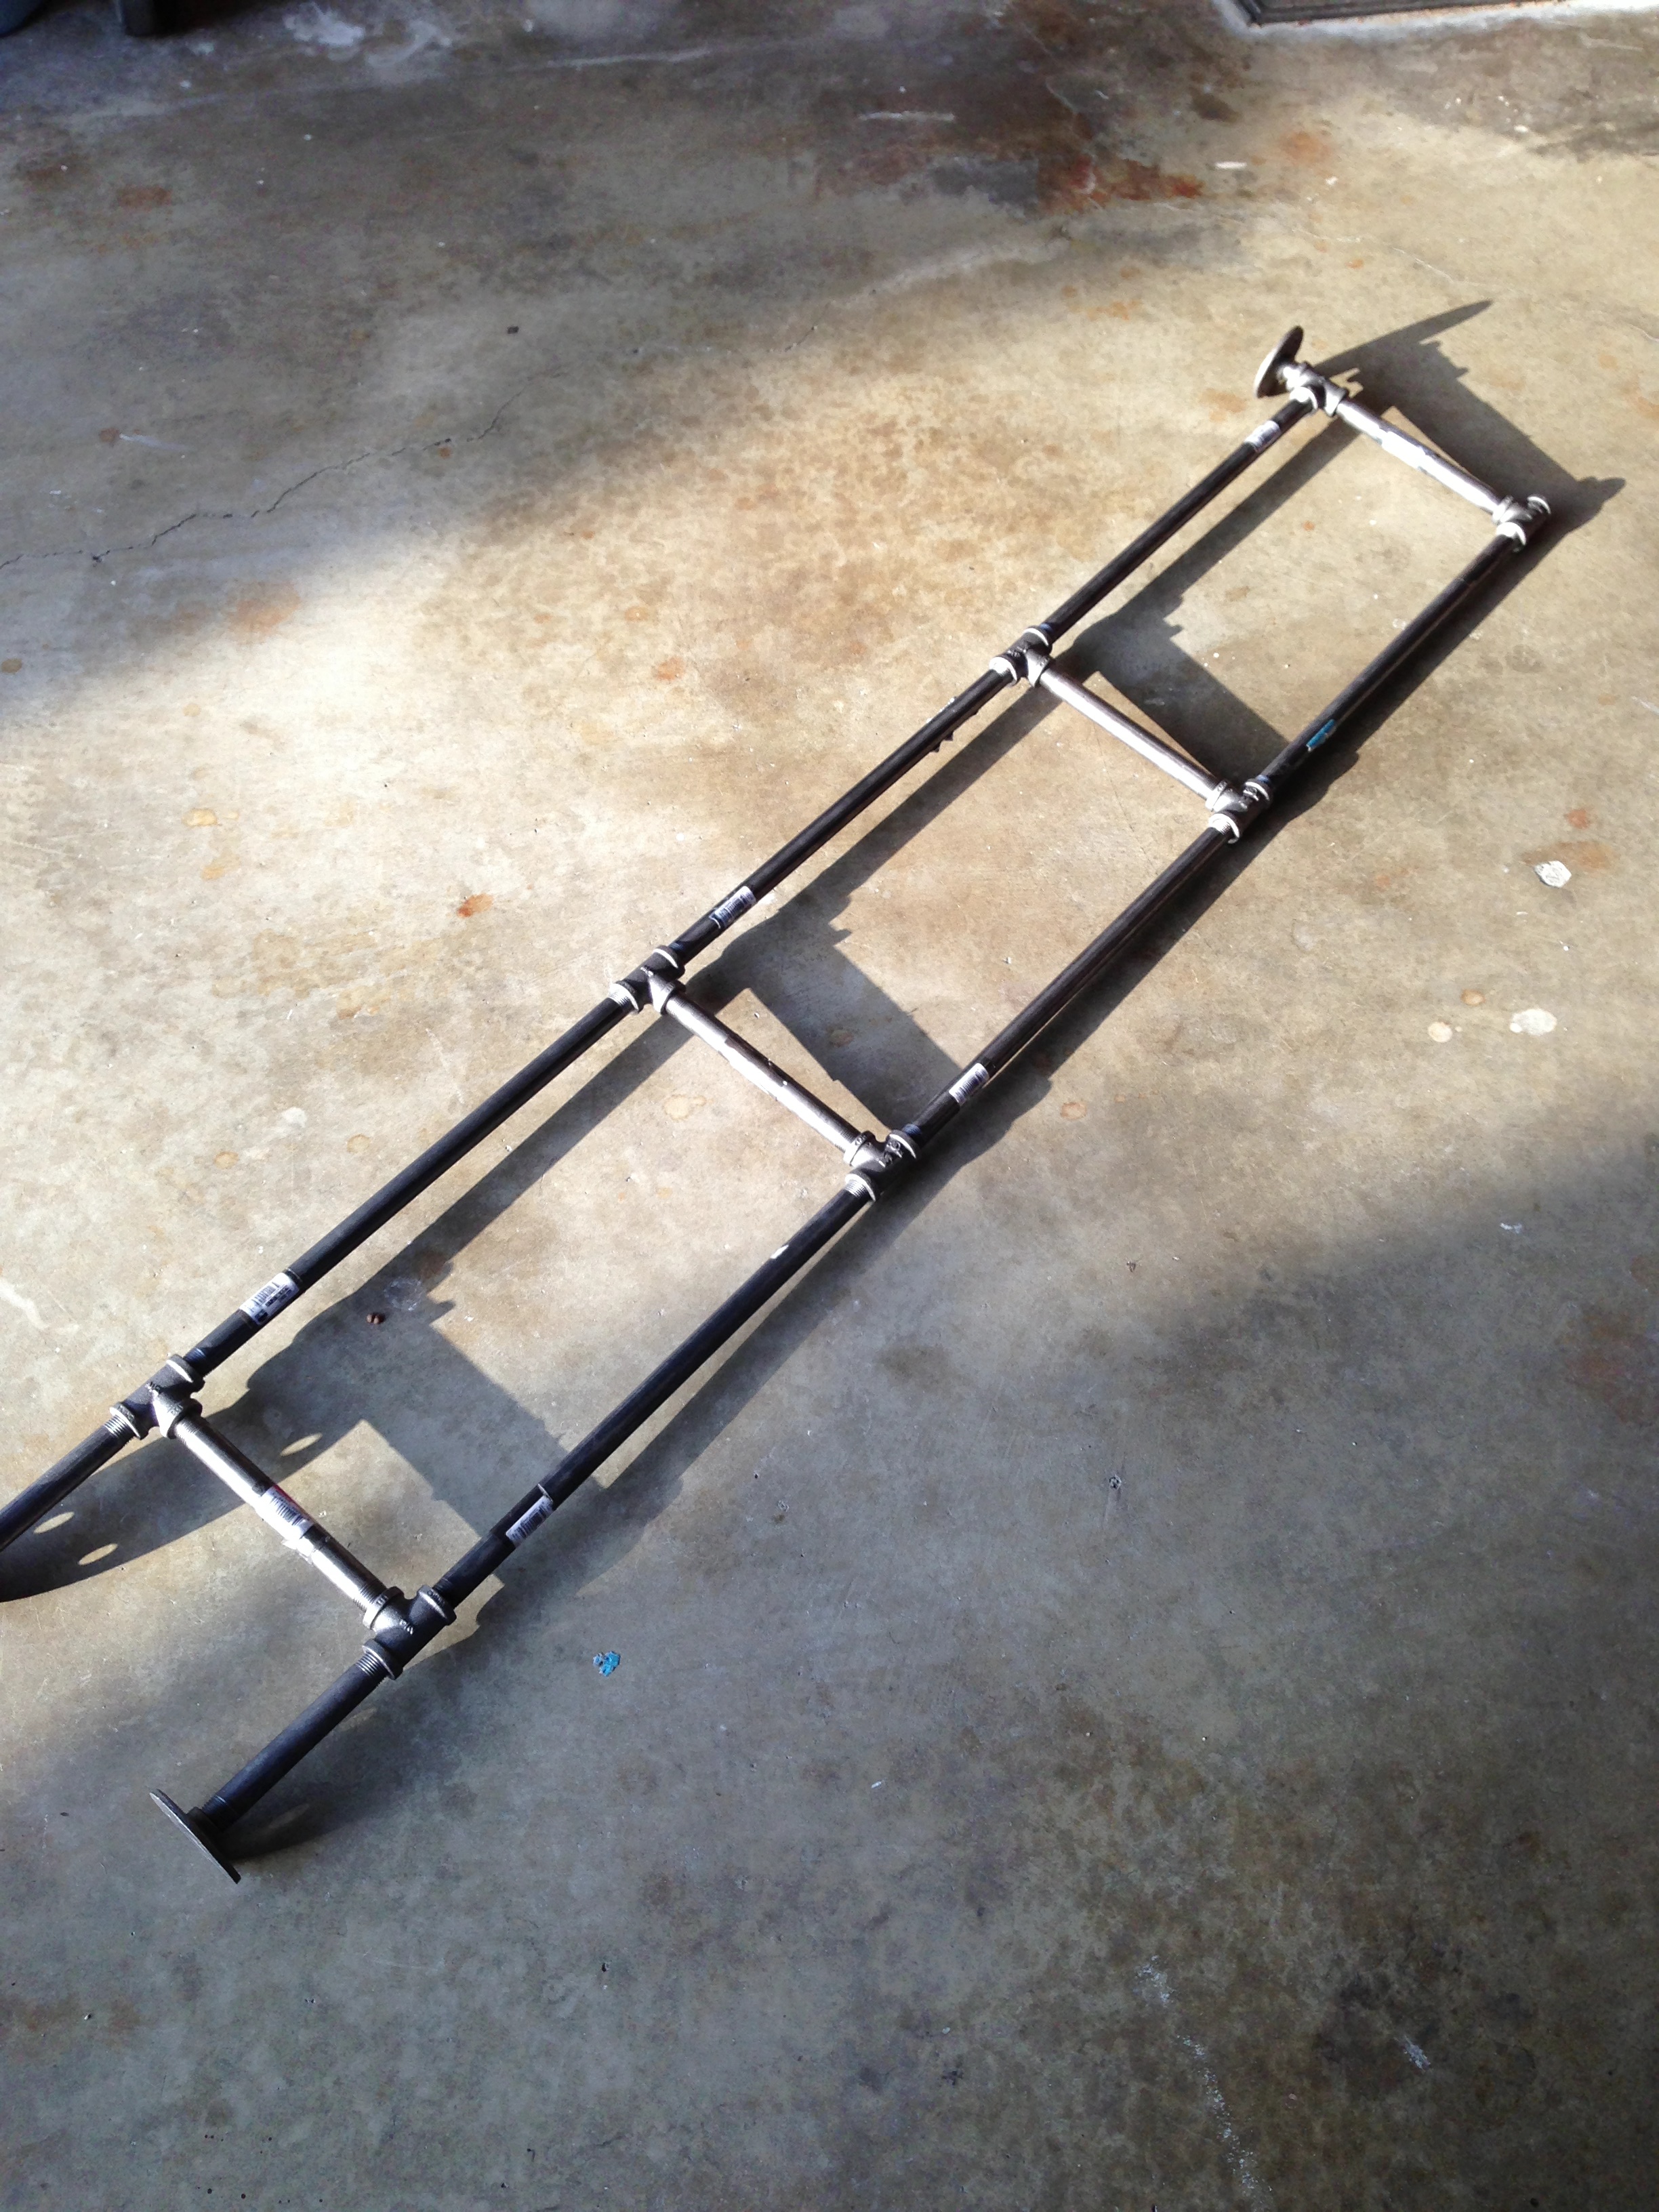
After a long attempt at trying to figure out a way to assemble this where everything fit perfectly, I searched the net again and found that everyone who makes these has this same problem. The solution was also offered at Keen: screw the last pipe in tightly on one end, then as you screw in the other end, you have some slack to attach everything. The pipe ends up being half-screwed-in at both sides. Not ideal, but the only way to do this. With that problem solved, the rest was simple!
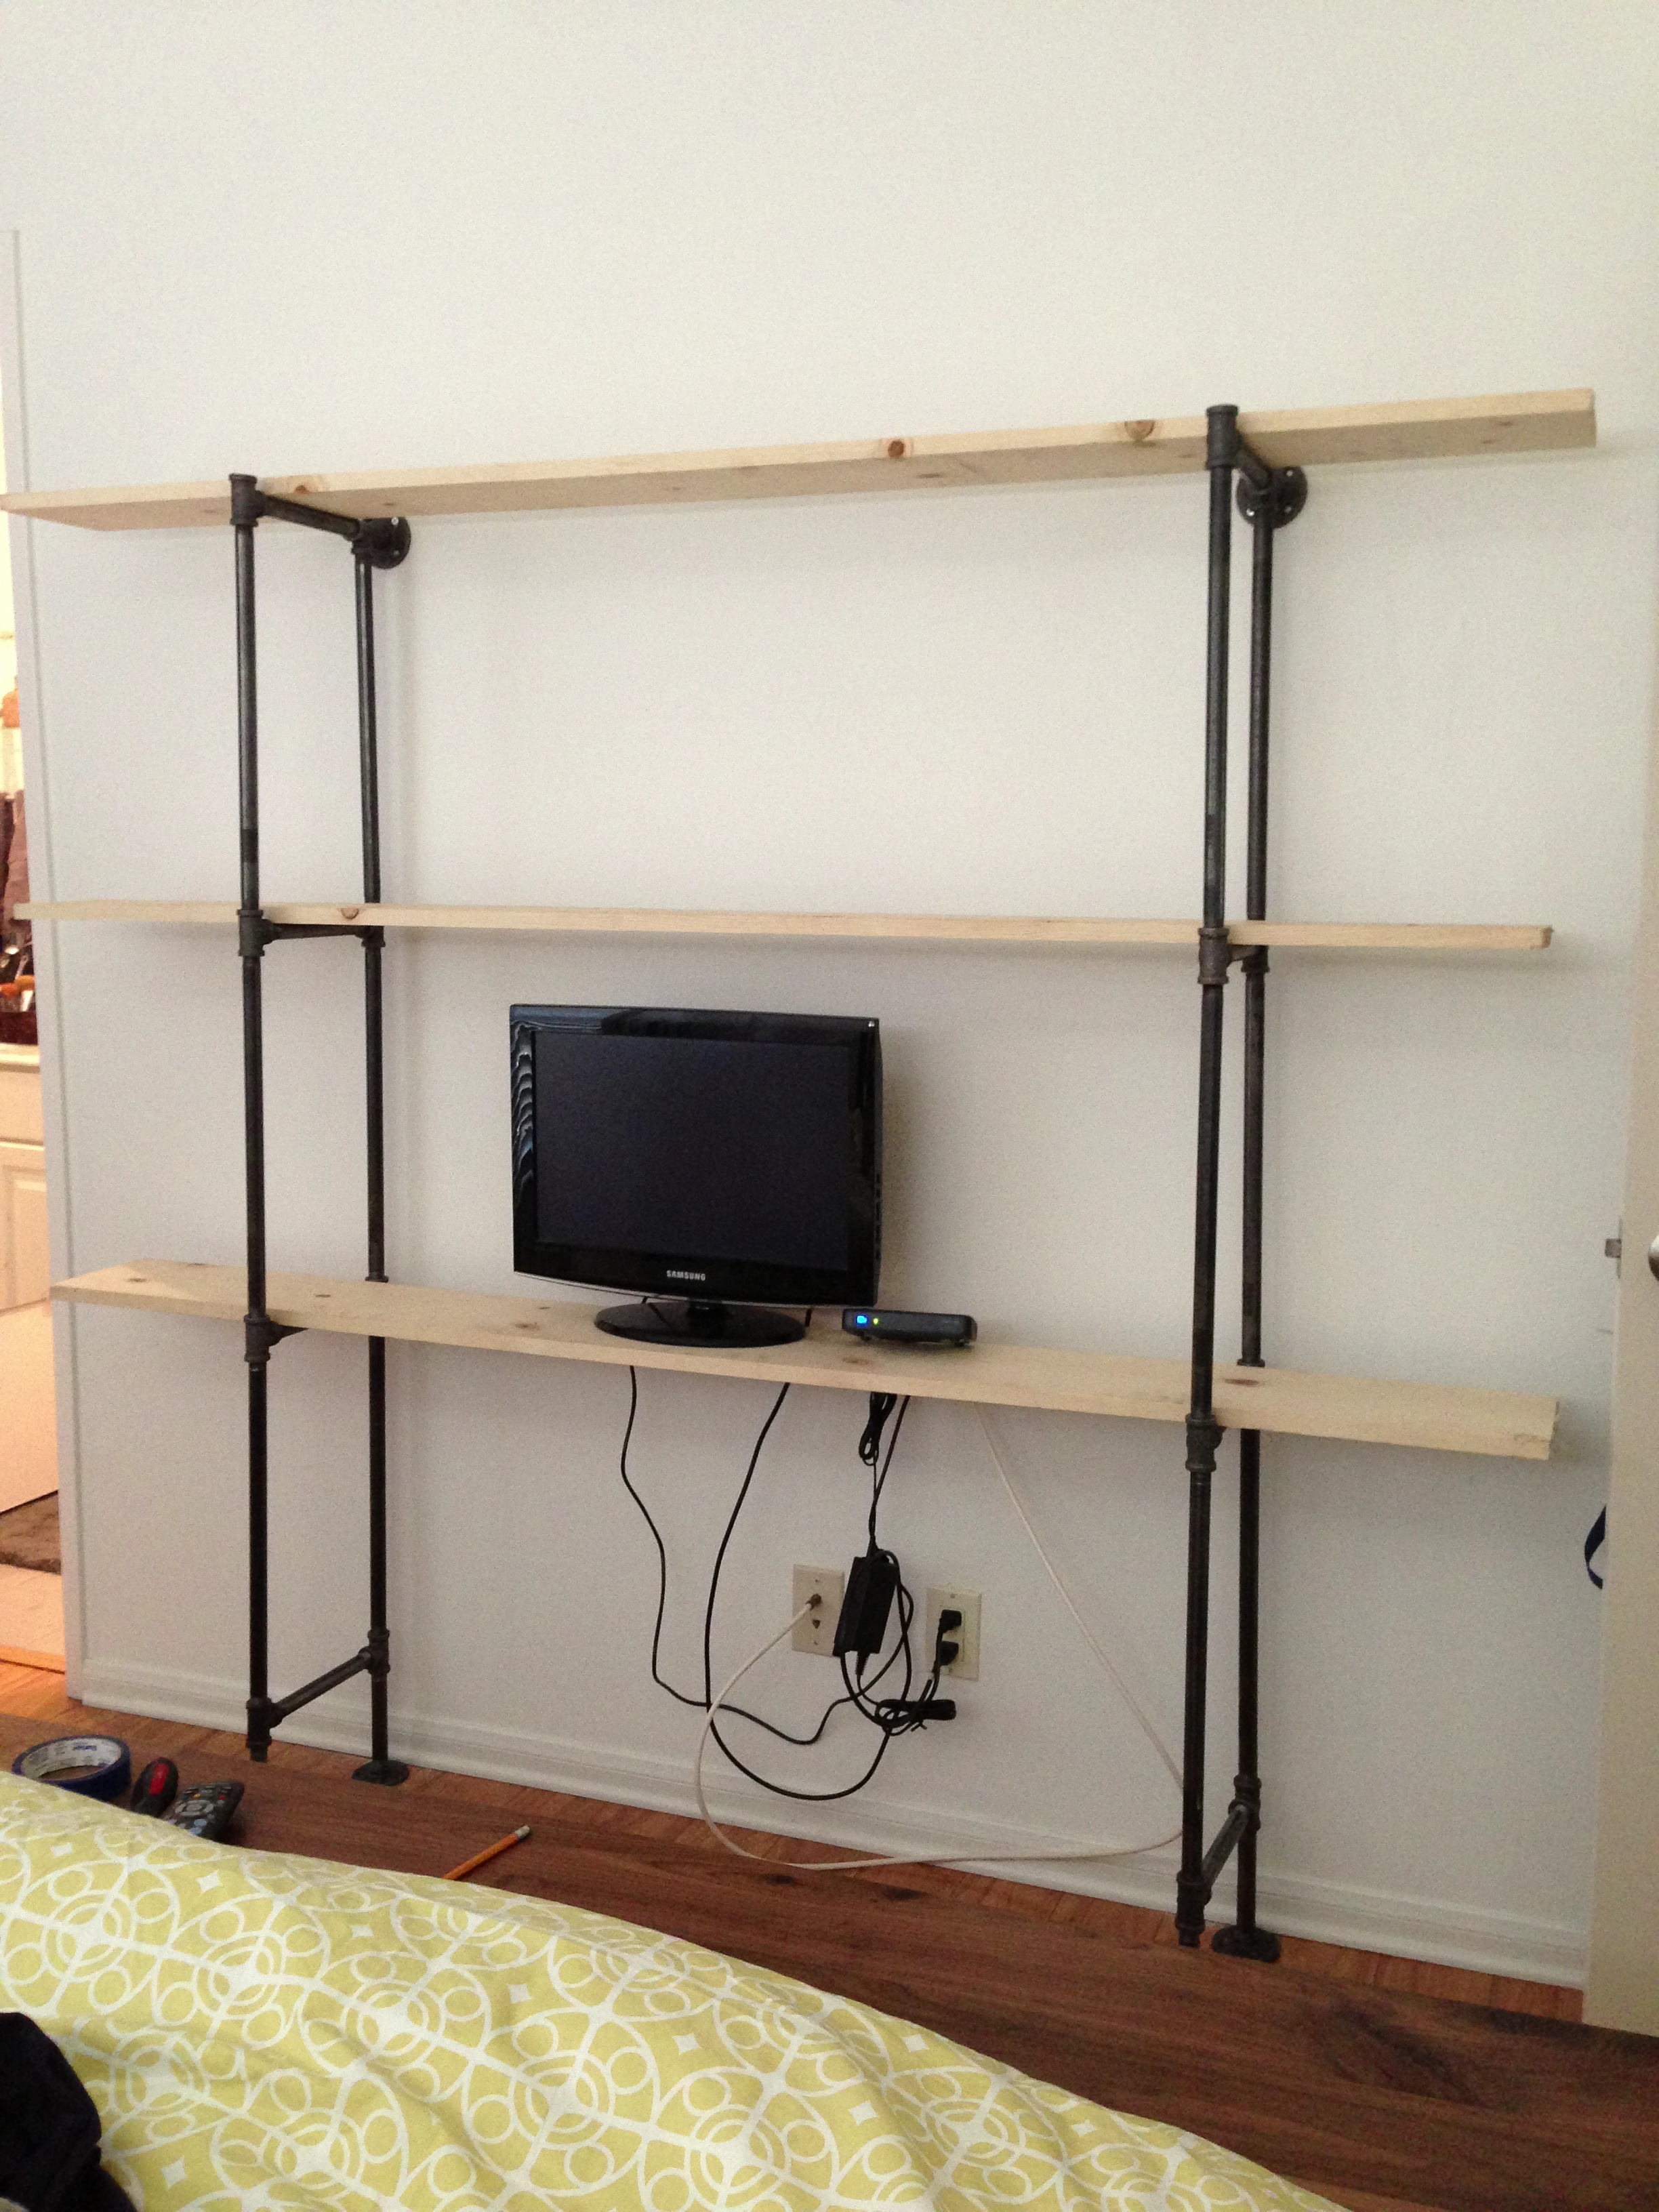
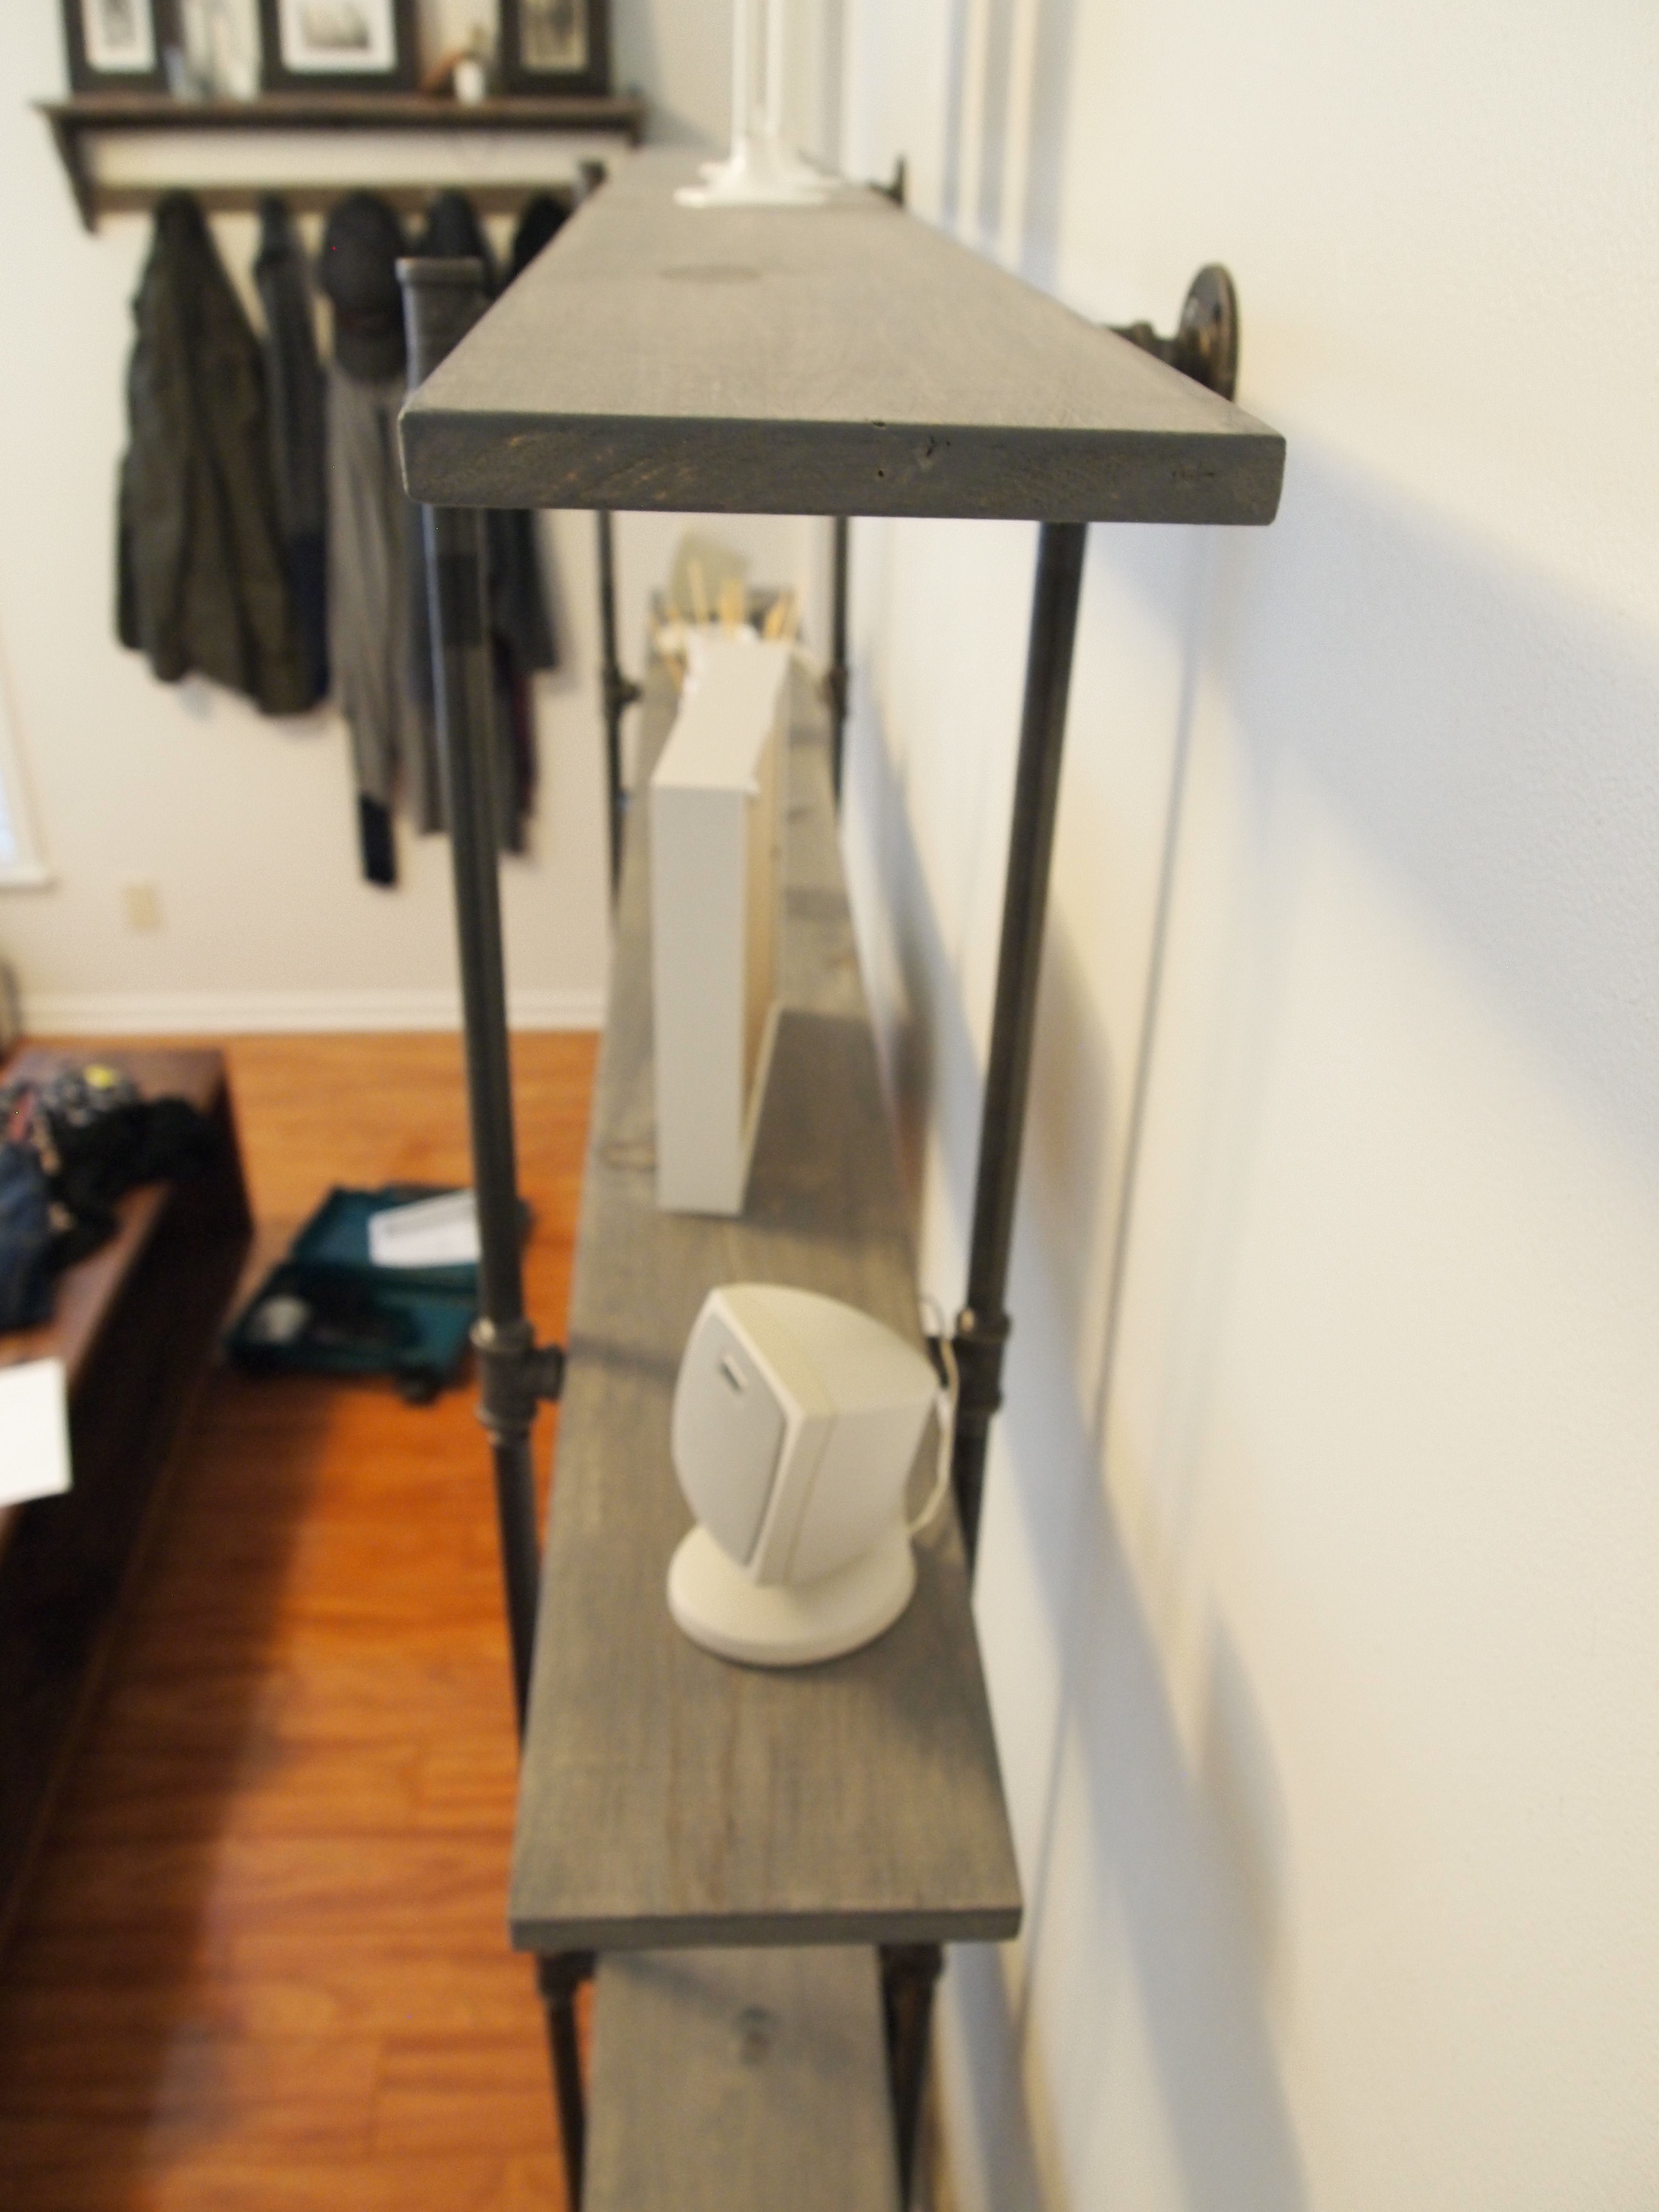
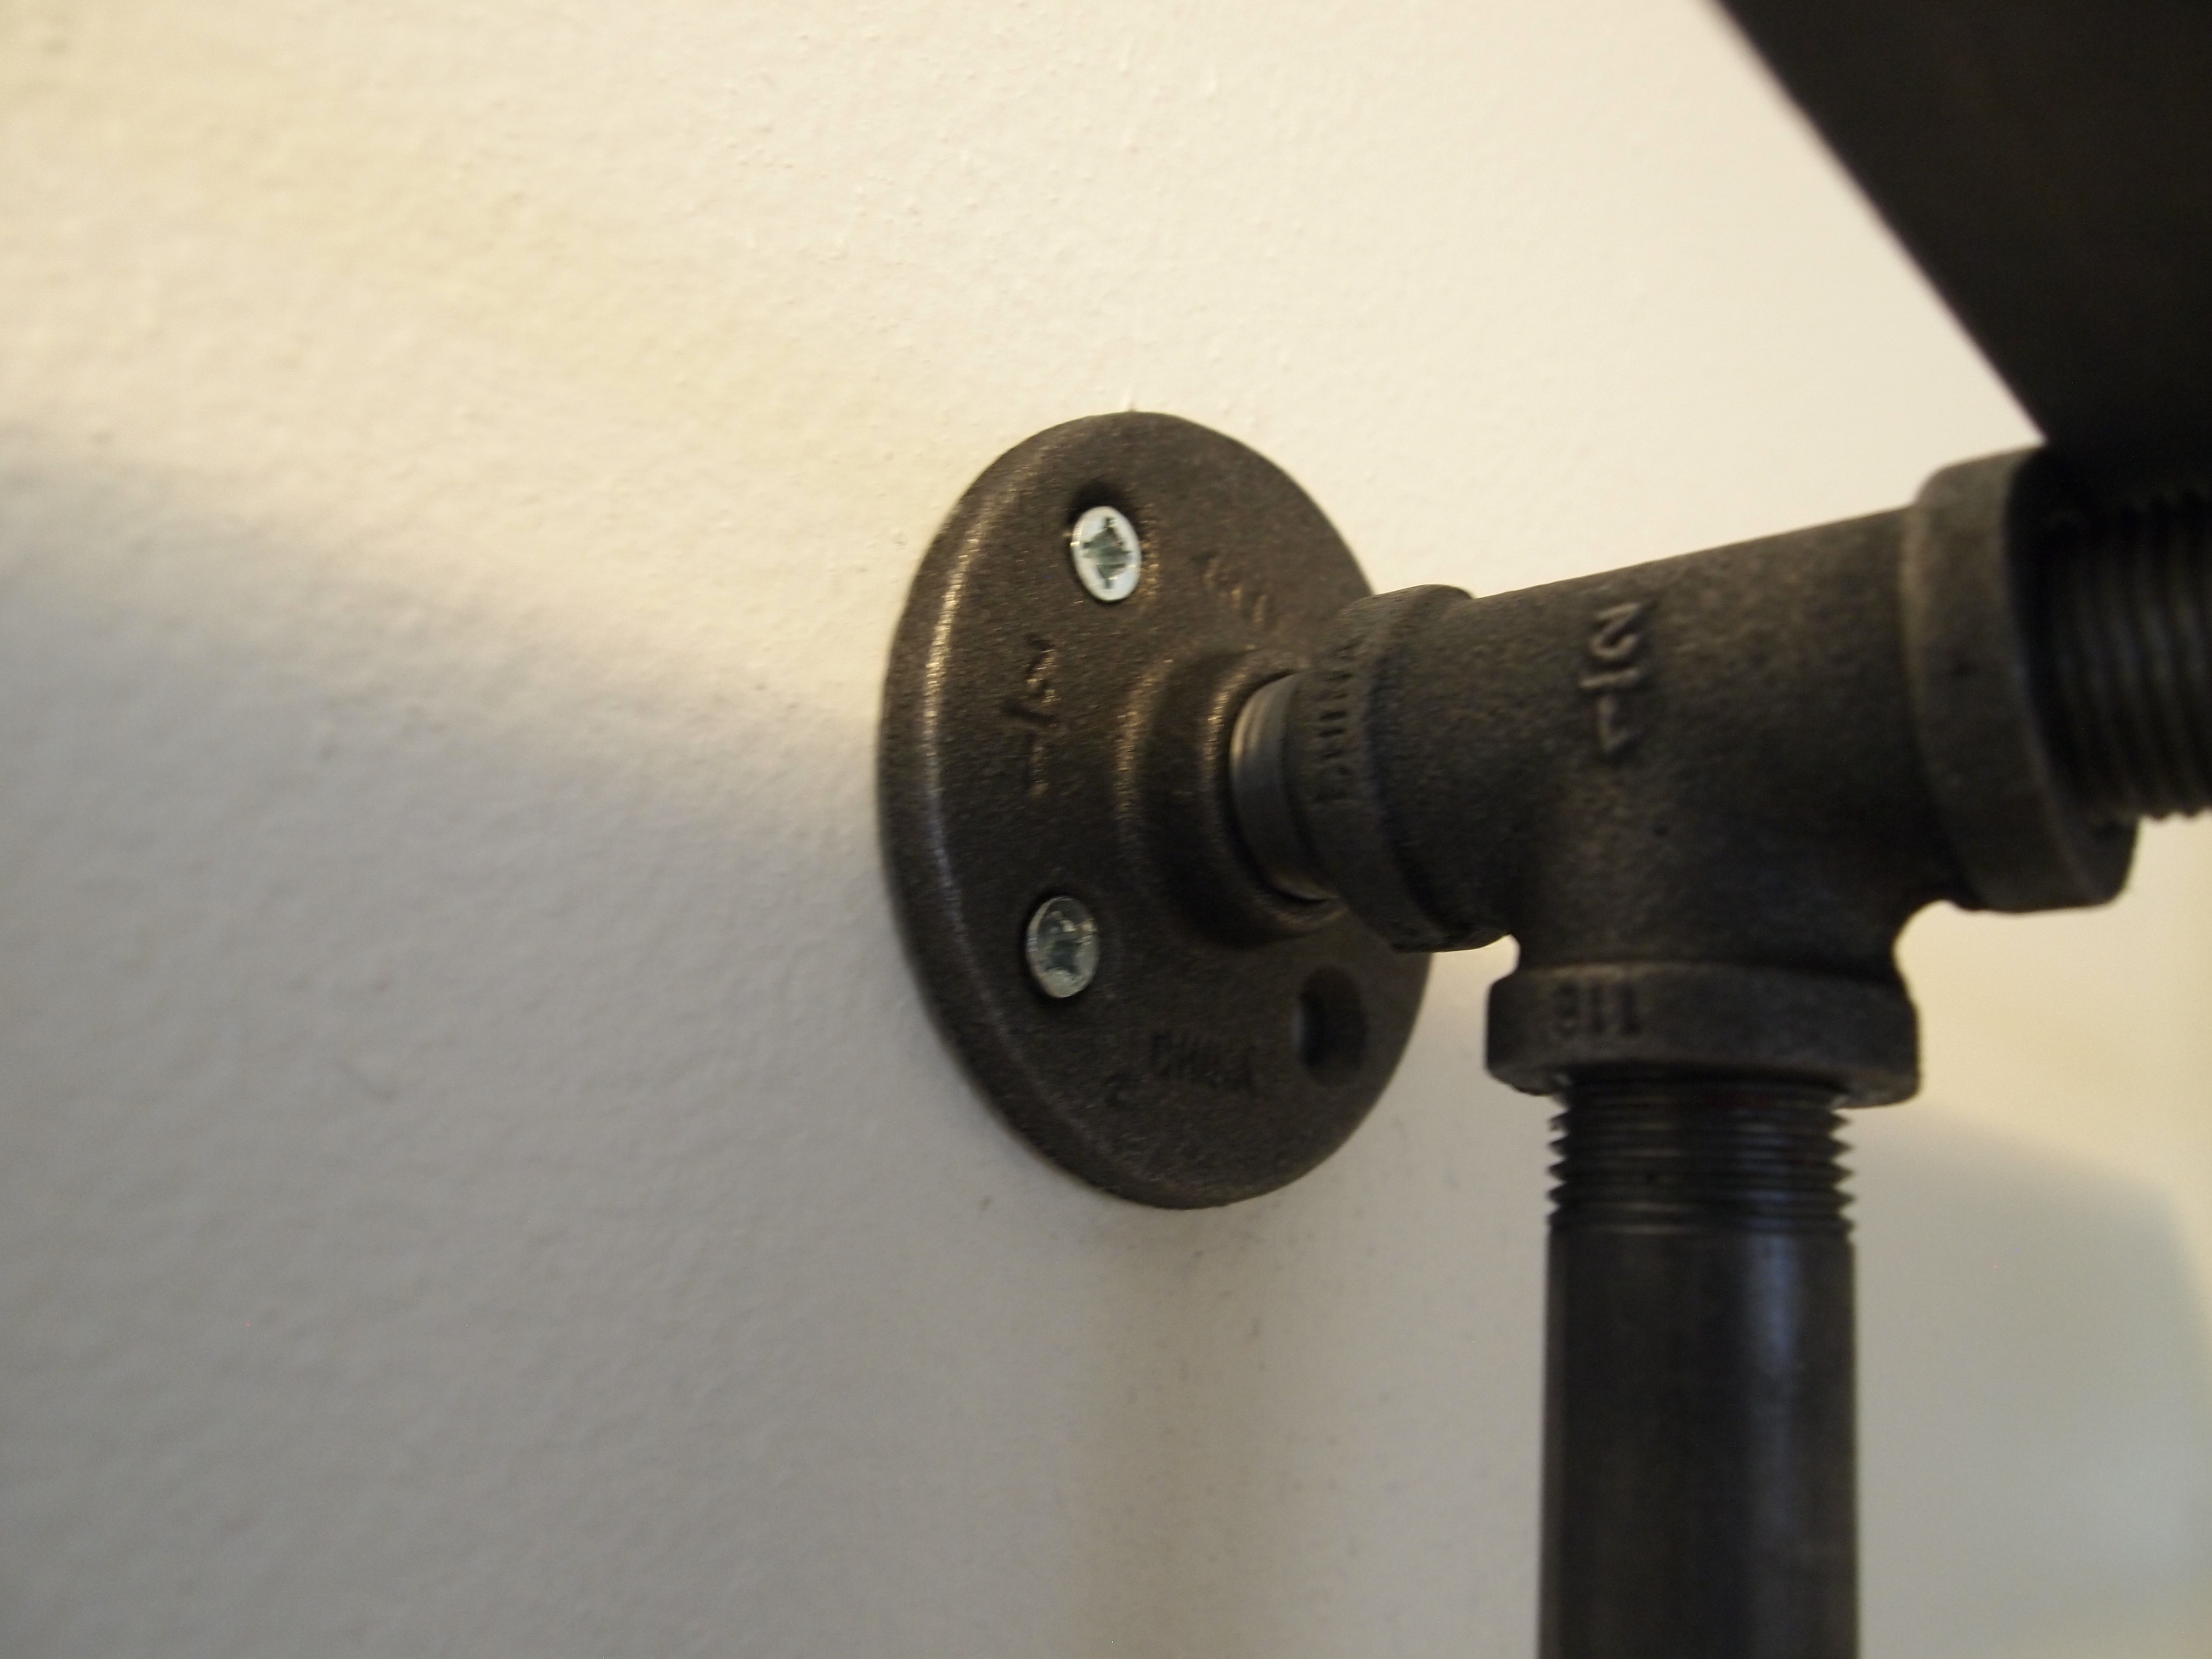
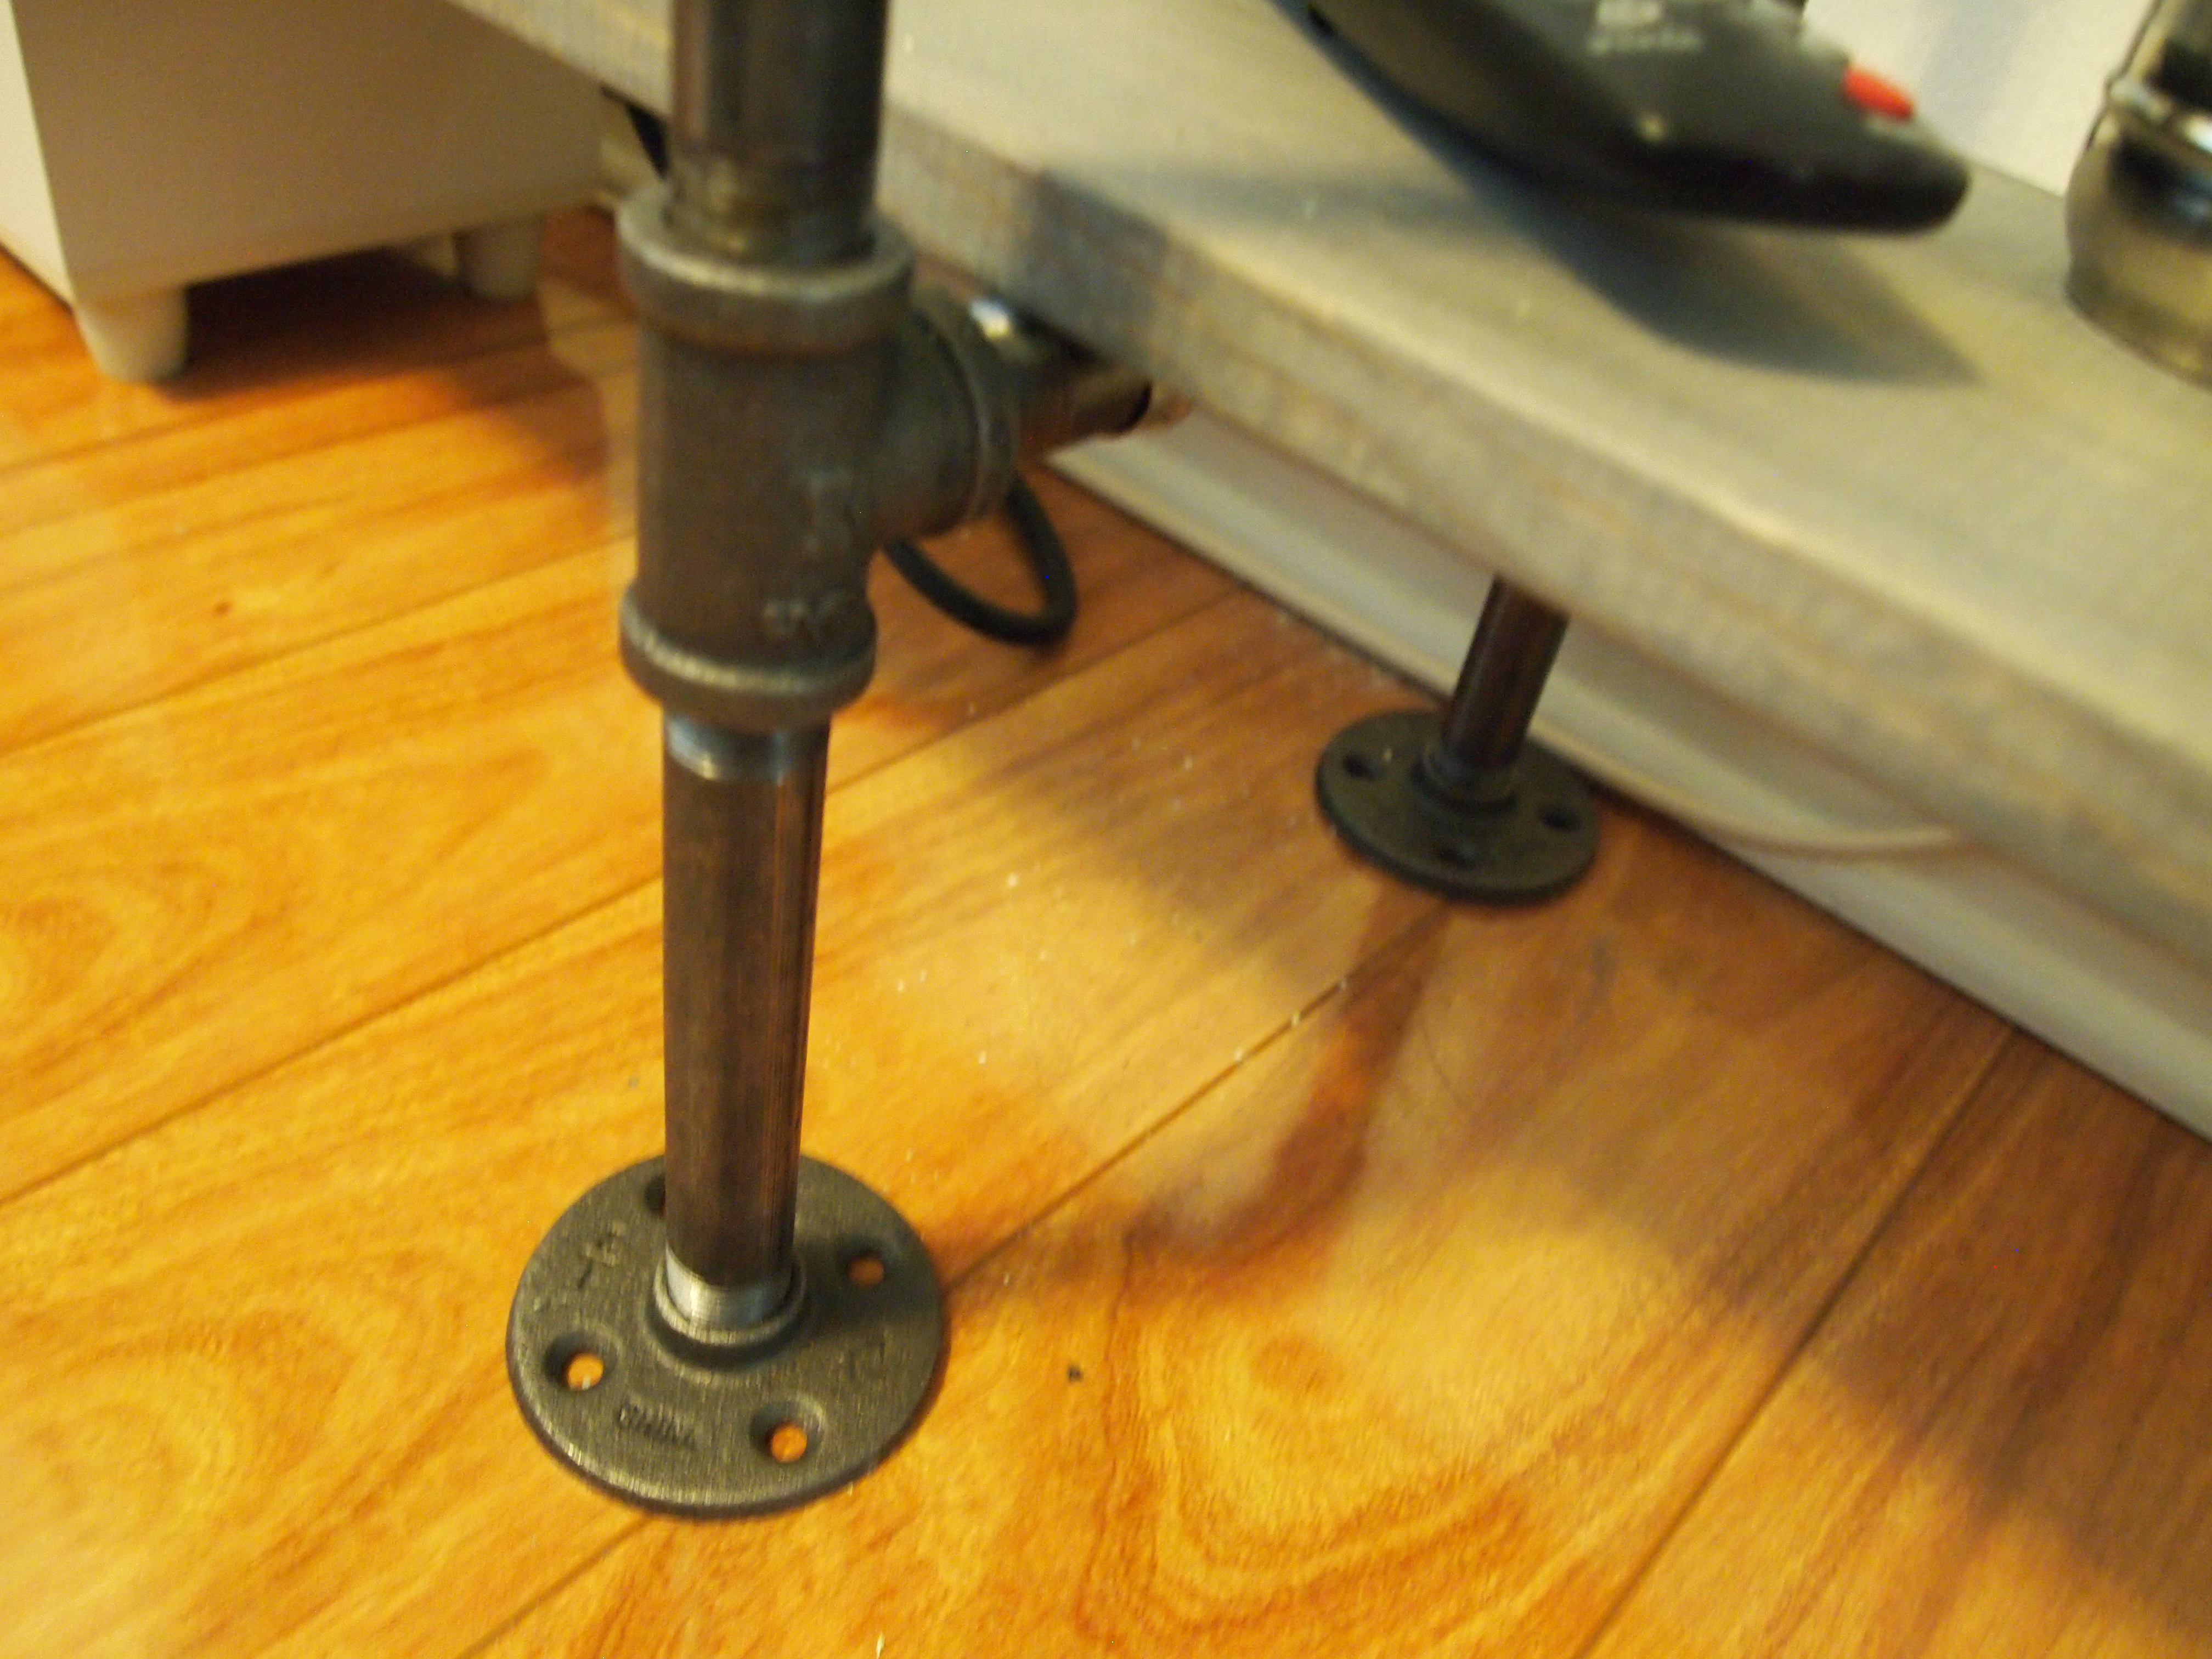
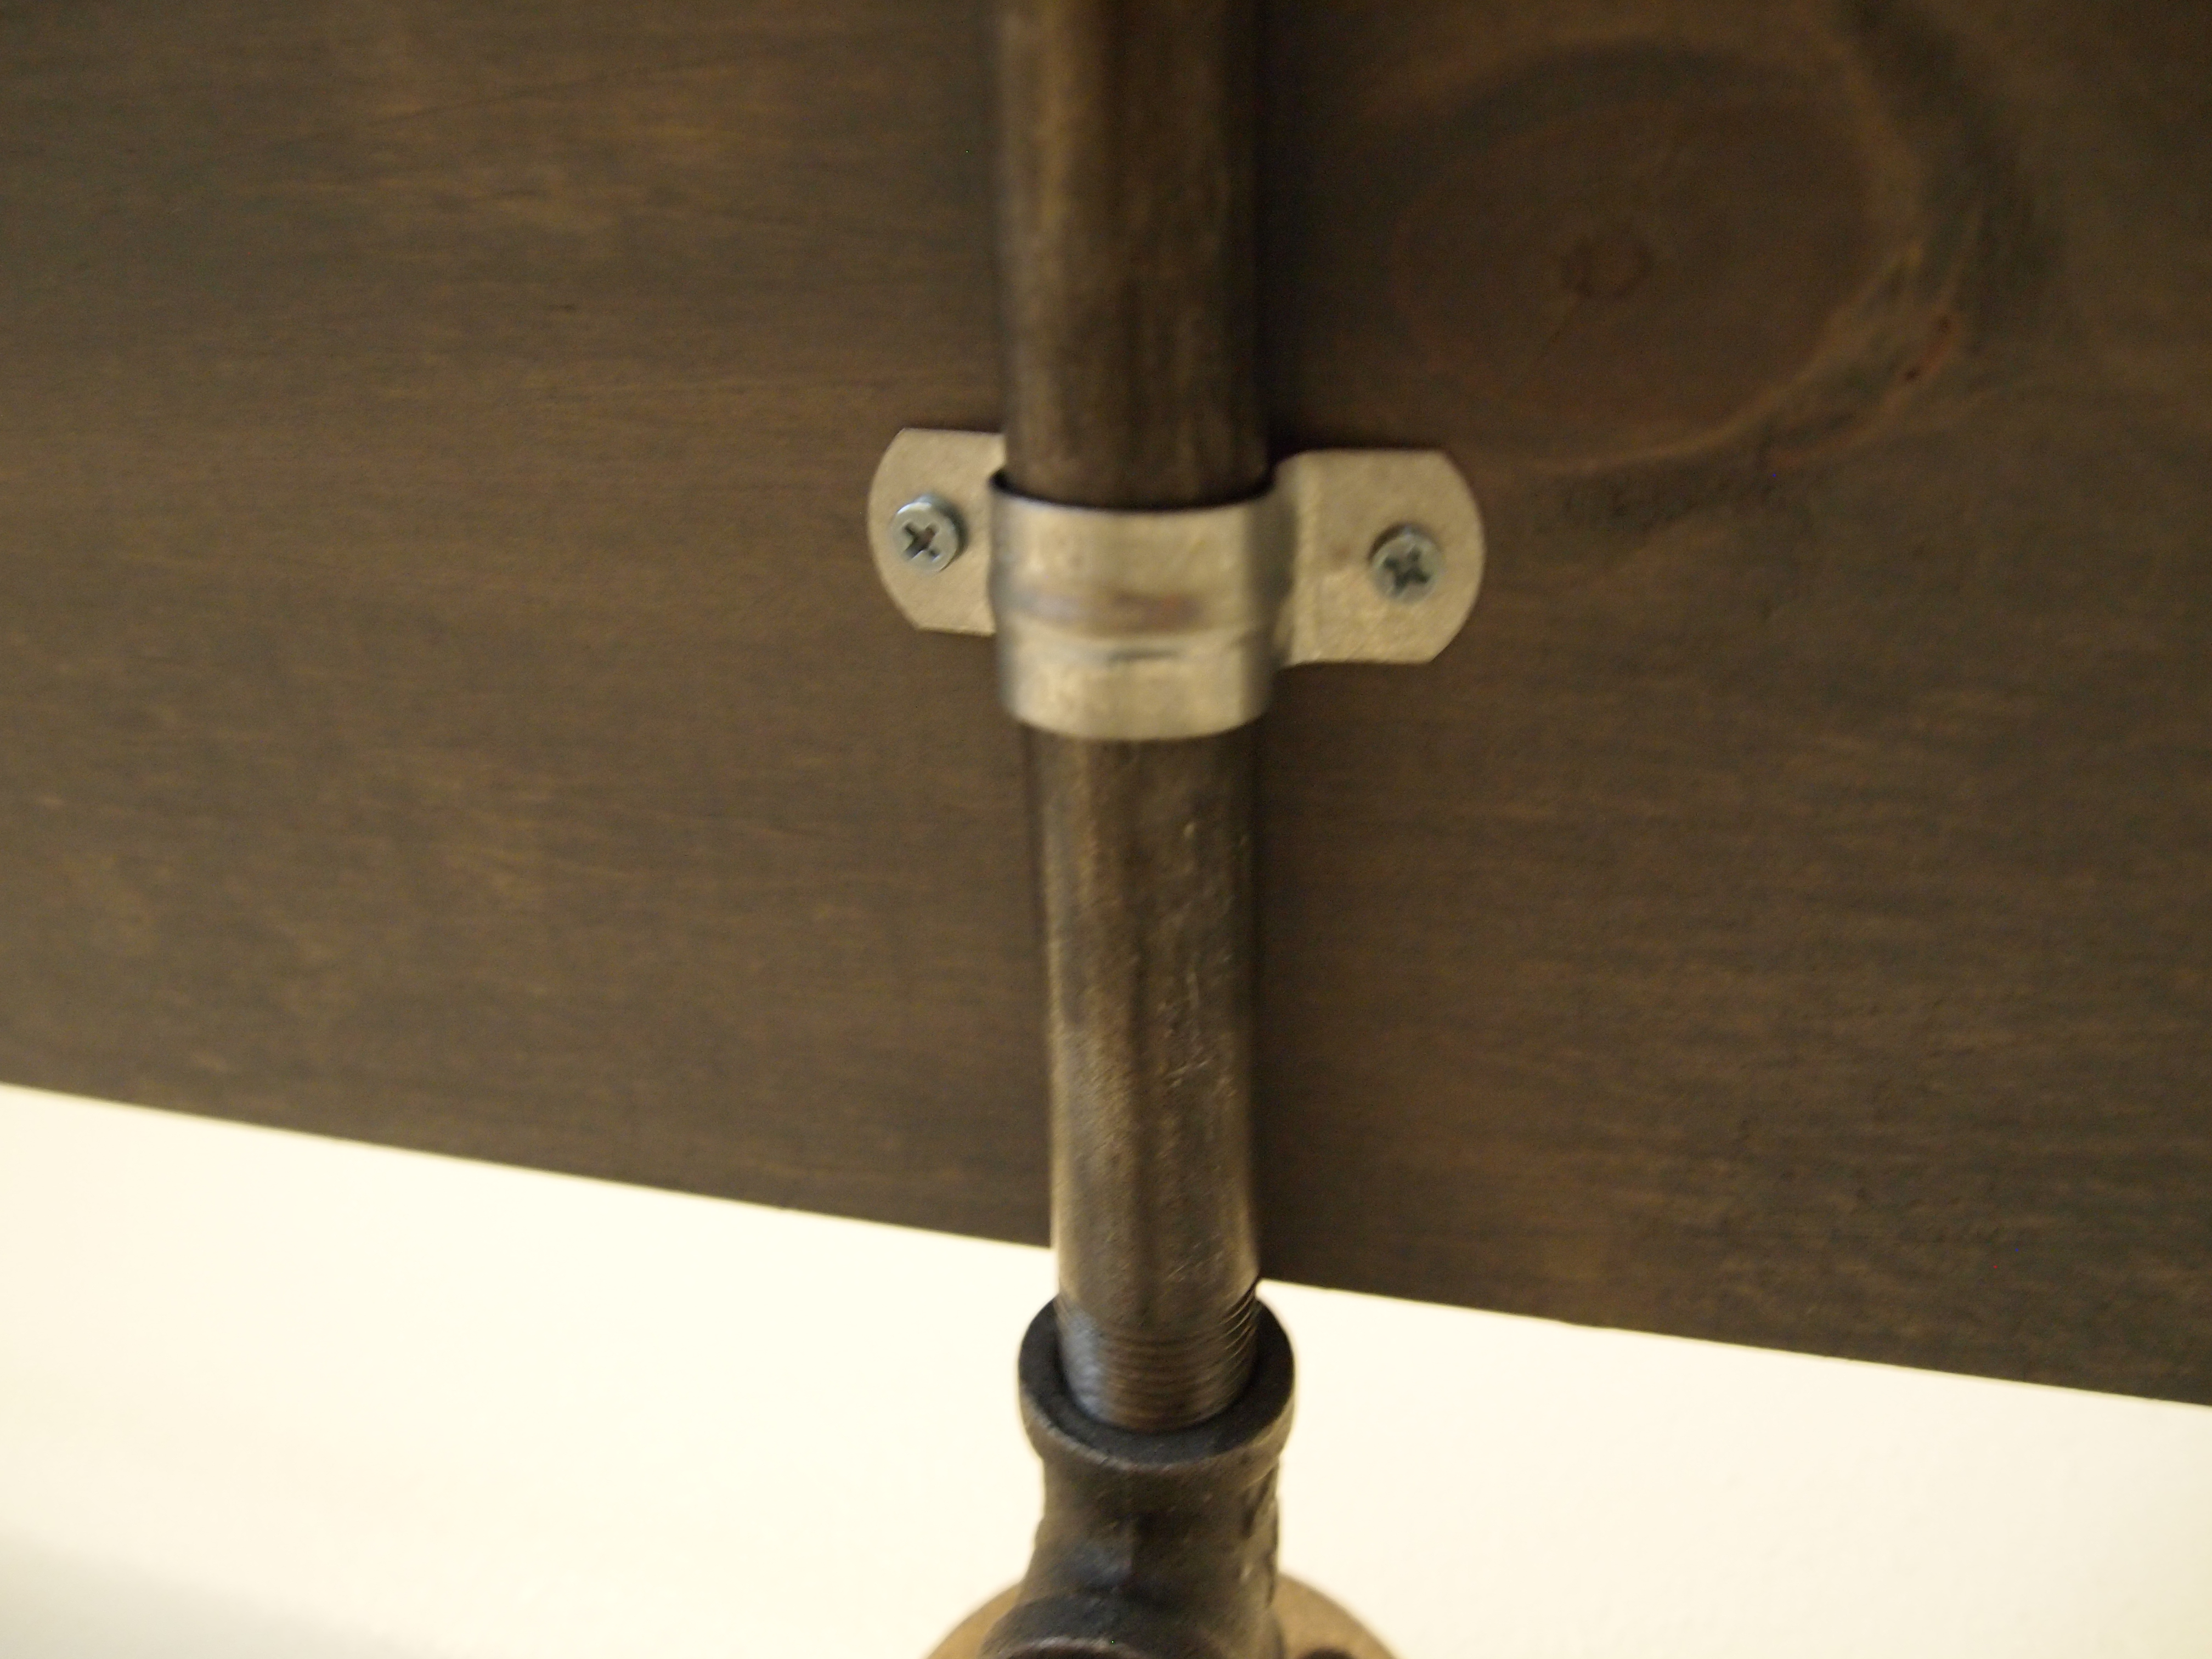
I anchored the pipes to the wall using some small wood screws and the top flange pieces. Some like to paint the pipes a flat black, but my wife and I liked the lighter metal color. I used 6ft 1×8 spruce boards for the actual shelves. I sanded the edges, then stained them a light gray color.
Thanks to Keen for the idea, plans, and pictures for the industrial pipe shelf. And now, the final product of my rendition…


I love your post and I am so glad everything worked out well for the project! It looks great in the space! Thanks for sharing with me.
omg. looks so great! i spy a pic of me. and also my favorite picture of you EVER!!!!!!!!!!!!!!!!!!!!!
you are so like jesus. haha.
I would love to replicate this shell. I have found something similar but its really small. Do you have a list of all the materials that were required? And do you know what the final dimensions are?
Thanks
Hi Leah,
Thanks for the comment! Here’s a list of materials:
*all pipes are 1/2″ diameter
18″ black steel pipes (12)
8″ black steel pipes (8)
6″ black steel pipes (4)
black steel flanges (6)
black steel T-joints (16)
1/2″ galvanized steel pipe straps (8)
6ft long 1×8 spruce boards (4)
Minwax Woodfinish wood stain (I used classic gray) – you don’t use much, so you can get the smallest can they have.
The final dimensions of the shelf are:
66.5″ tall
6ft wide
12.5″ deep
Have fun!
Hi! Love your shelf, I’m trying to build a similar version! Question: did you use another piece to screw the top flanges into the t joint??
Hi Jessica!
Yes! You caught my error when I listed my materials. I purchased 2 pipe fittings that were threaded on both ends. It’s a small piece only a few inches long, but connects the flange and the T-joint together. Let me know if you have any other questions. Good luck with your shelf!
Hi. I love your shelf. My husband and I are pretty avid DIYers and consider ourselves pretty handy, but this particular project is kicking our butts. We are struggling with getting the two units level and symmetrical. After struggling with getting them together and realizing they are not completely square and the shelf supports are not the exact same distance, we decided to just call it a night and try again today. Just wondering if this was an issue for you.
Hi Autum!
Yes, this project was a beast. After a few initial tries I discovered that it would be near impossible to get things the way I envisioned them. I think you just have to be satisfied with getting things “close enough”. When I started, the other bloggers that did this project made it look so simple and perfect! I was extremely frustrated when doing this shelf. I did a lot of adjustments, then more readjustments… and in the end, it wasn’t 100% precise, but the shelf did look good enough to the naked eye that people were still impressed! I’ve come to realize that only certain designs of this pipe shelf can be done in a more perfect way, but that would mean getting thicker boards, screwing the pipes directly into the boards, and perhaps even anchoring the pipes into the floor (none of which I wanted to do).
The only bit of helpful advice I can give is to just tinker with it until you like what you see. Blogs can be deceiving! 🙂 It’s not going to be an engineering masterpiece, but it will look good once it is erected and your stuff is placed on the shelf. Good luck to you and your husband, and feel free to ask any more questions that arise.
Thanks so much for the reply. After a couple days away from the evil pipes, my husband gave it another try and was able to wiggle things around, tightening one side and loosening another, till it was nearly square and level. Thanks for the encouragement.
I agree. I made the shelf about 9 months ago and it was extremely frustrating because I am not the strongest girl in the world. It turned out I had to look at it like a puzzle. Some prices are slightly longer or shorter and depending on how you put them together you could make the alignment better. That may be kind of vague but of you are working on he project I’m sure you know what I’m talking about.
I know exactly what you mean Leah. It looks so simple, but is far from it. I do love it now that it’s finished though.
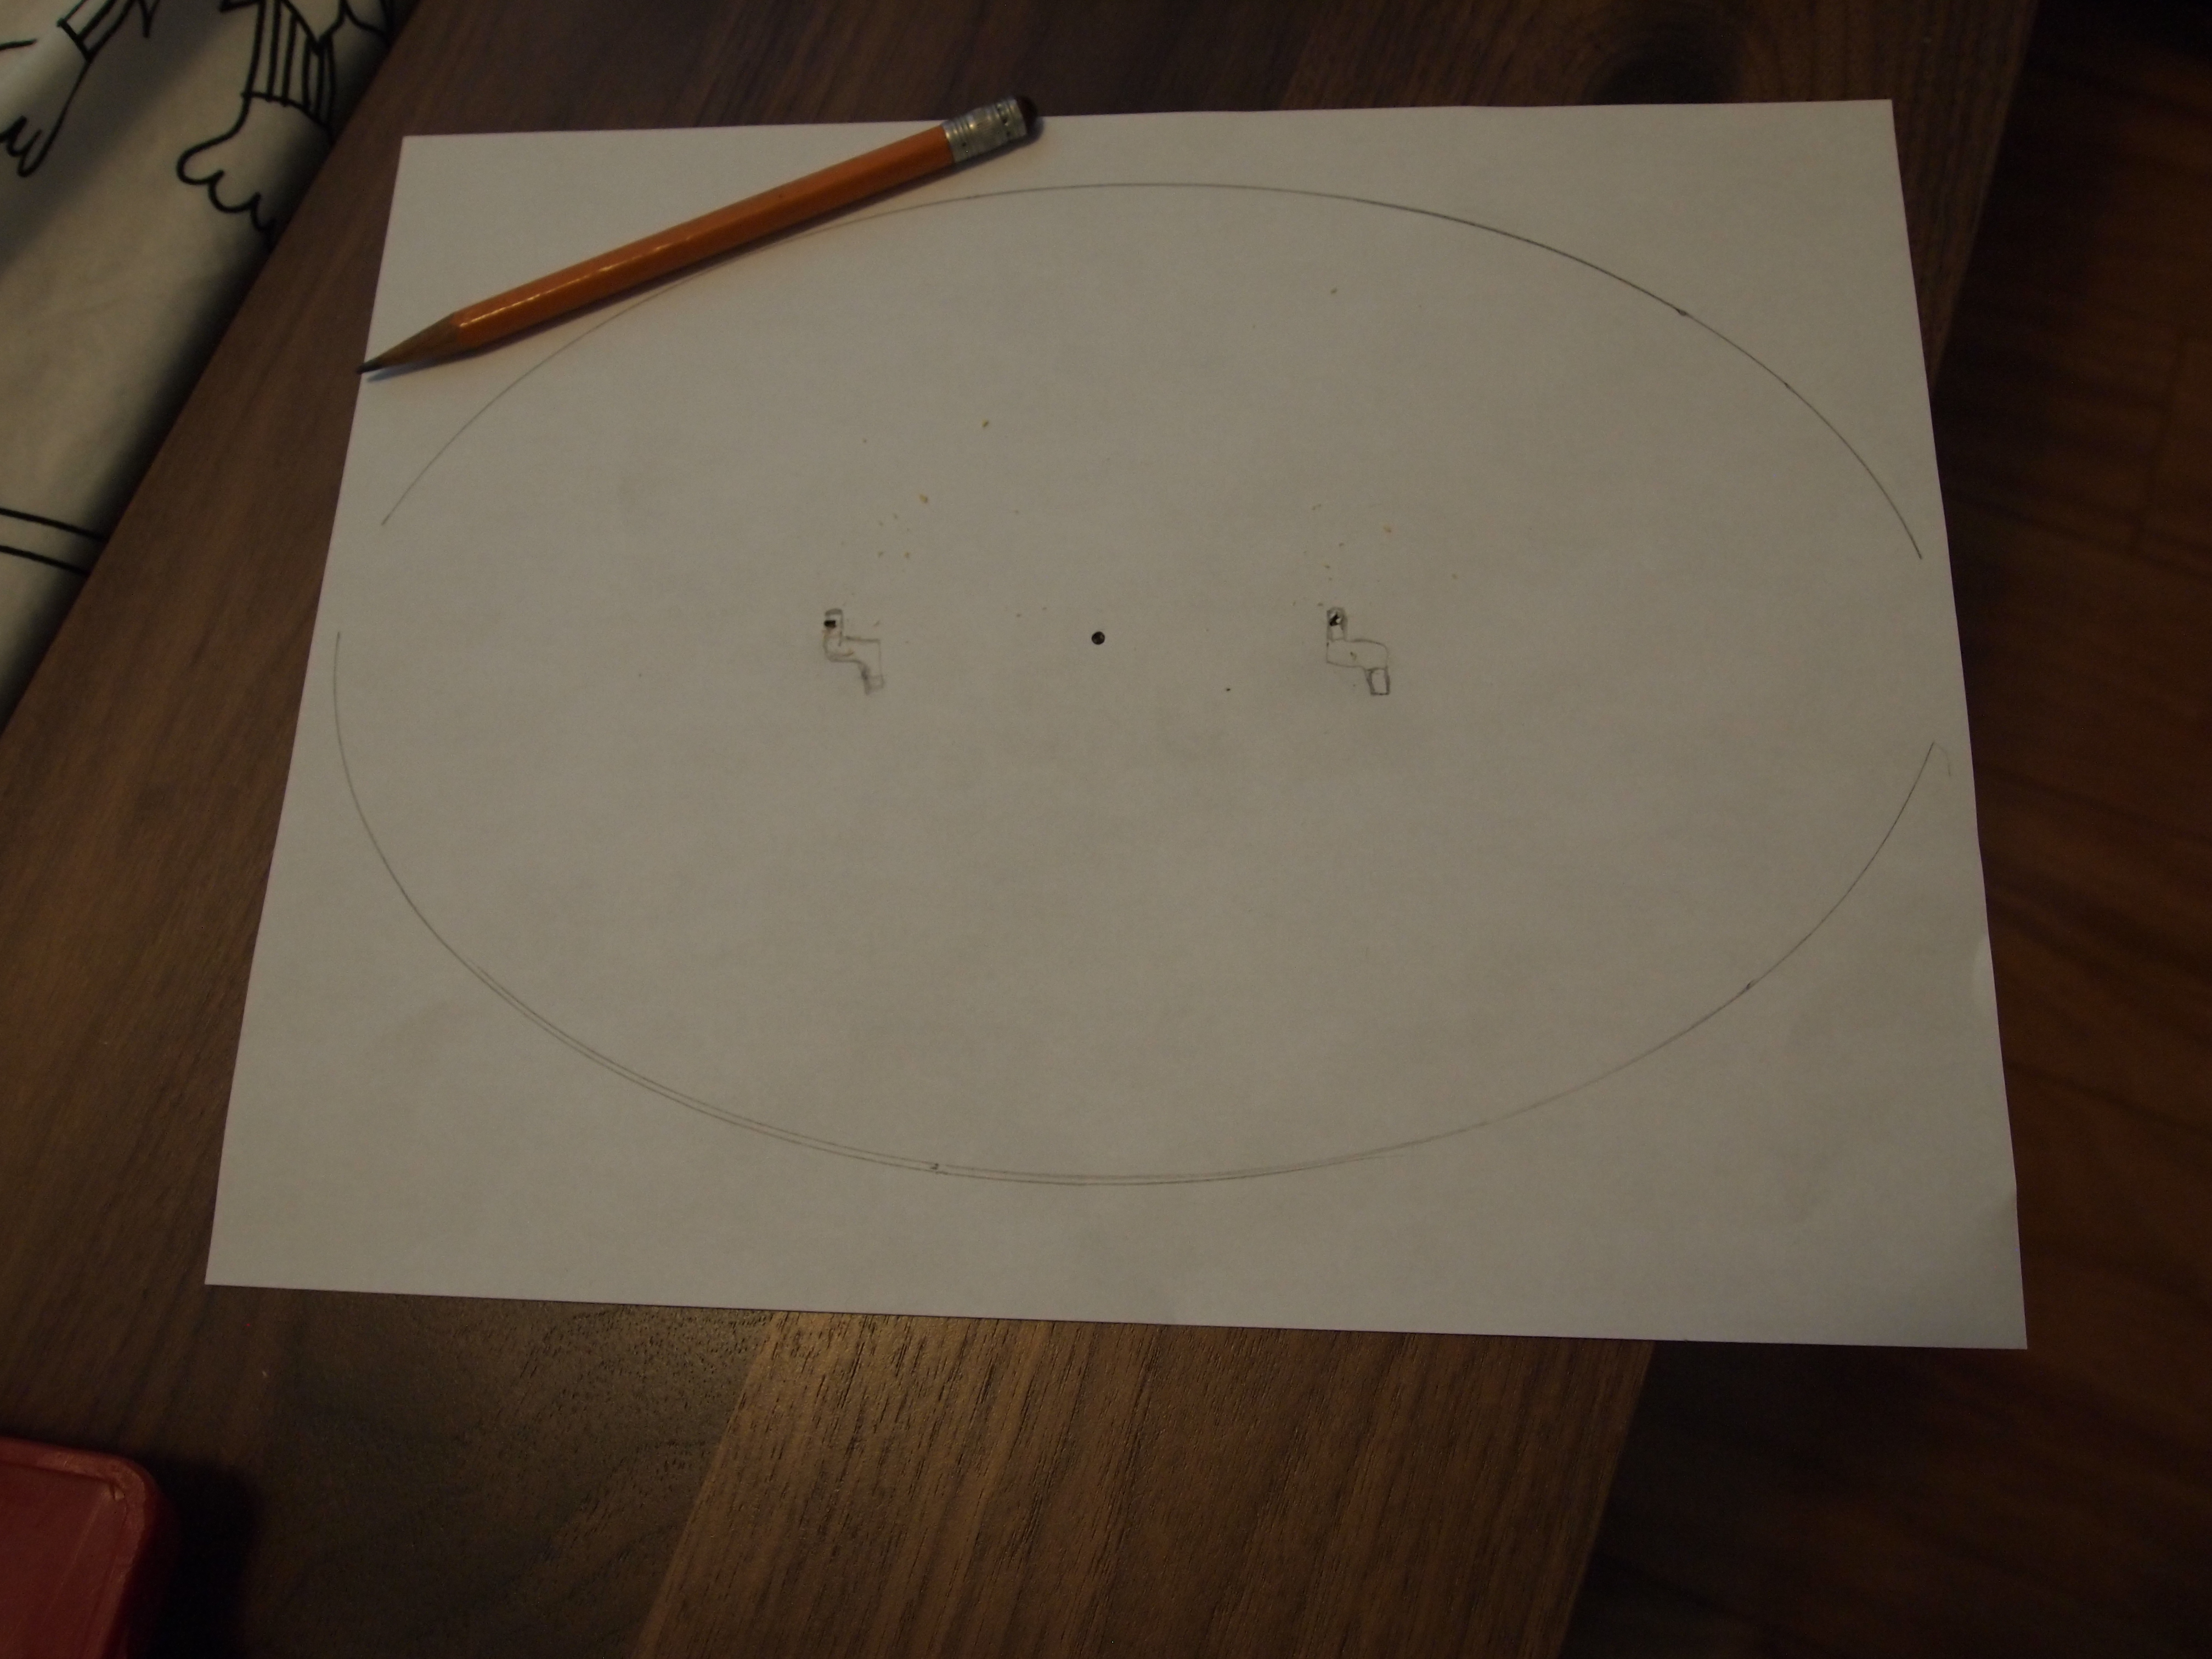
This is definitely a puzzle! I found a pic of a dining table with pipe legs online, and I want to try that next. However, these shelves have given me confidence that the table IS possible… yet humility to know that it will be more difficult than it seems. haha!